
Afraid of Manual Mode - Try Aperture Mode Instead!
Does the phrase ‘Manual Mode’ just freak you out when thinking of improving your photography skills? I’m going to be straight up honest with you, that its NOT ALL THAT SCARY! But then again, if you don’t have someone to really show you how to jump into manual mode, sometimes its easier to take a baby step on your own, moving into Aperture Priority Mode first.
Why Aperture Priority?
Let me just explain first of all what Aperture Priority Mode is first. It’s a semi-automatic mode on your camera that lets you pick your preferred Aperture and ISO while the camera then figures out the required shutter speed.
Now back to Why Aperture Priority! Why? Because one of the main reasons people want to improve their photography is to get that blurred out background in their portrait shots.


This is a very typical style in portrait photography, where the subject is in focus leaving the background to be very blurred out or in photographer lingo ‘have a lot of bokeh’.
Full disclaimer though, the amount of bokeh is party dependent on your lens. Some lenses can get super bokehy and have backgrounds that are smooth as butter…while others just don’t have that same capabilities.
So if you are interested in learning more on how to get that blurred out background, keep reading!
A quick note on Aperture.
Aperture is also known as your F-Stop. It is talked about in terms of a number F/1.8, F/5, F/11, etc. The lower the number the shallower depth of field (aka you can get that very blurry background while keeping the subject in focus), the higher the number, the less depth of field (aka the background and foreground will not have that much difference with blurriness).
Below you will see how the background changes from F/ 1.8 to F/ 11.

F/ 1.8

F/ 2.8

F/ 5

F/ 8

F/ 11
Situations why you will want a shallow depth of field
Portrait photography
Detail photography – wedding details, macro photography, some product photography
Situations why you may want a higher depth of field
Landscape photography
Some product photography
Steps to Shoot in Aperture Mode
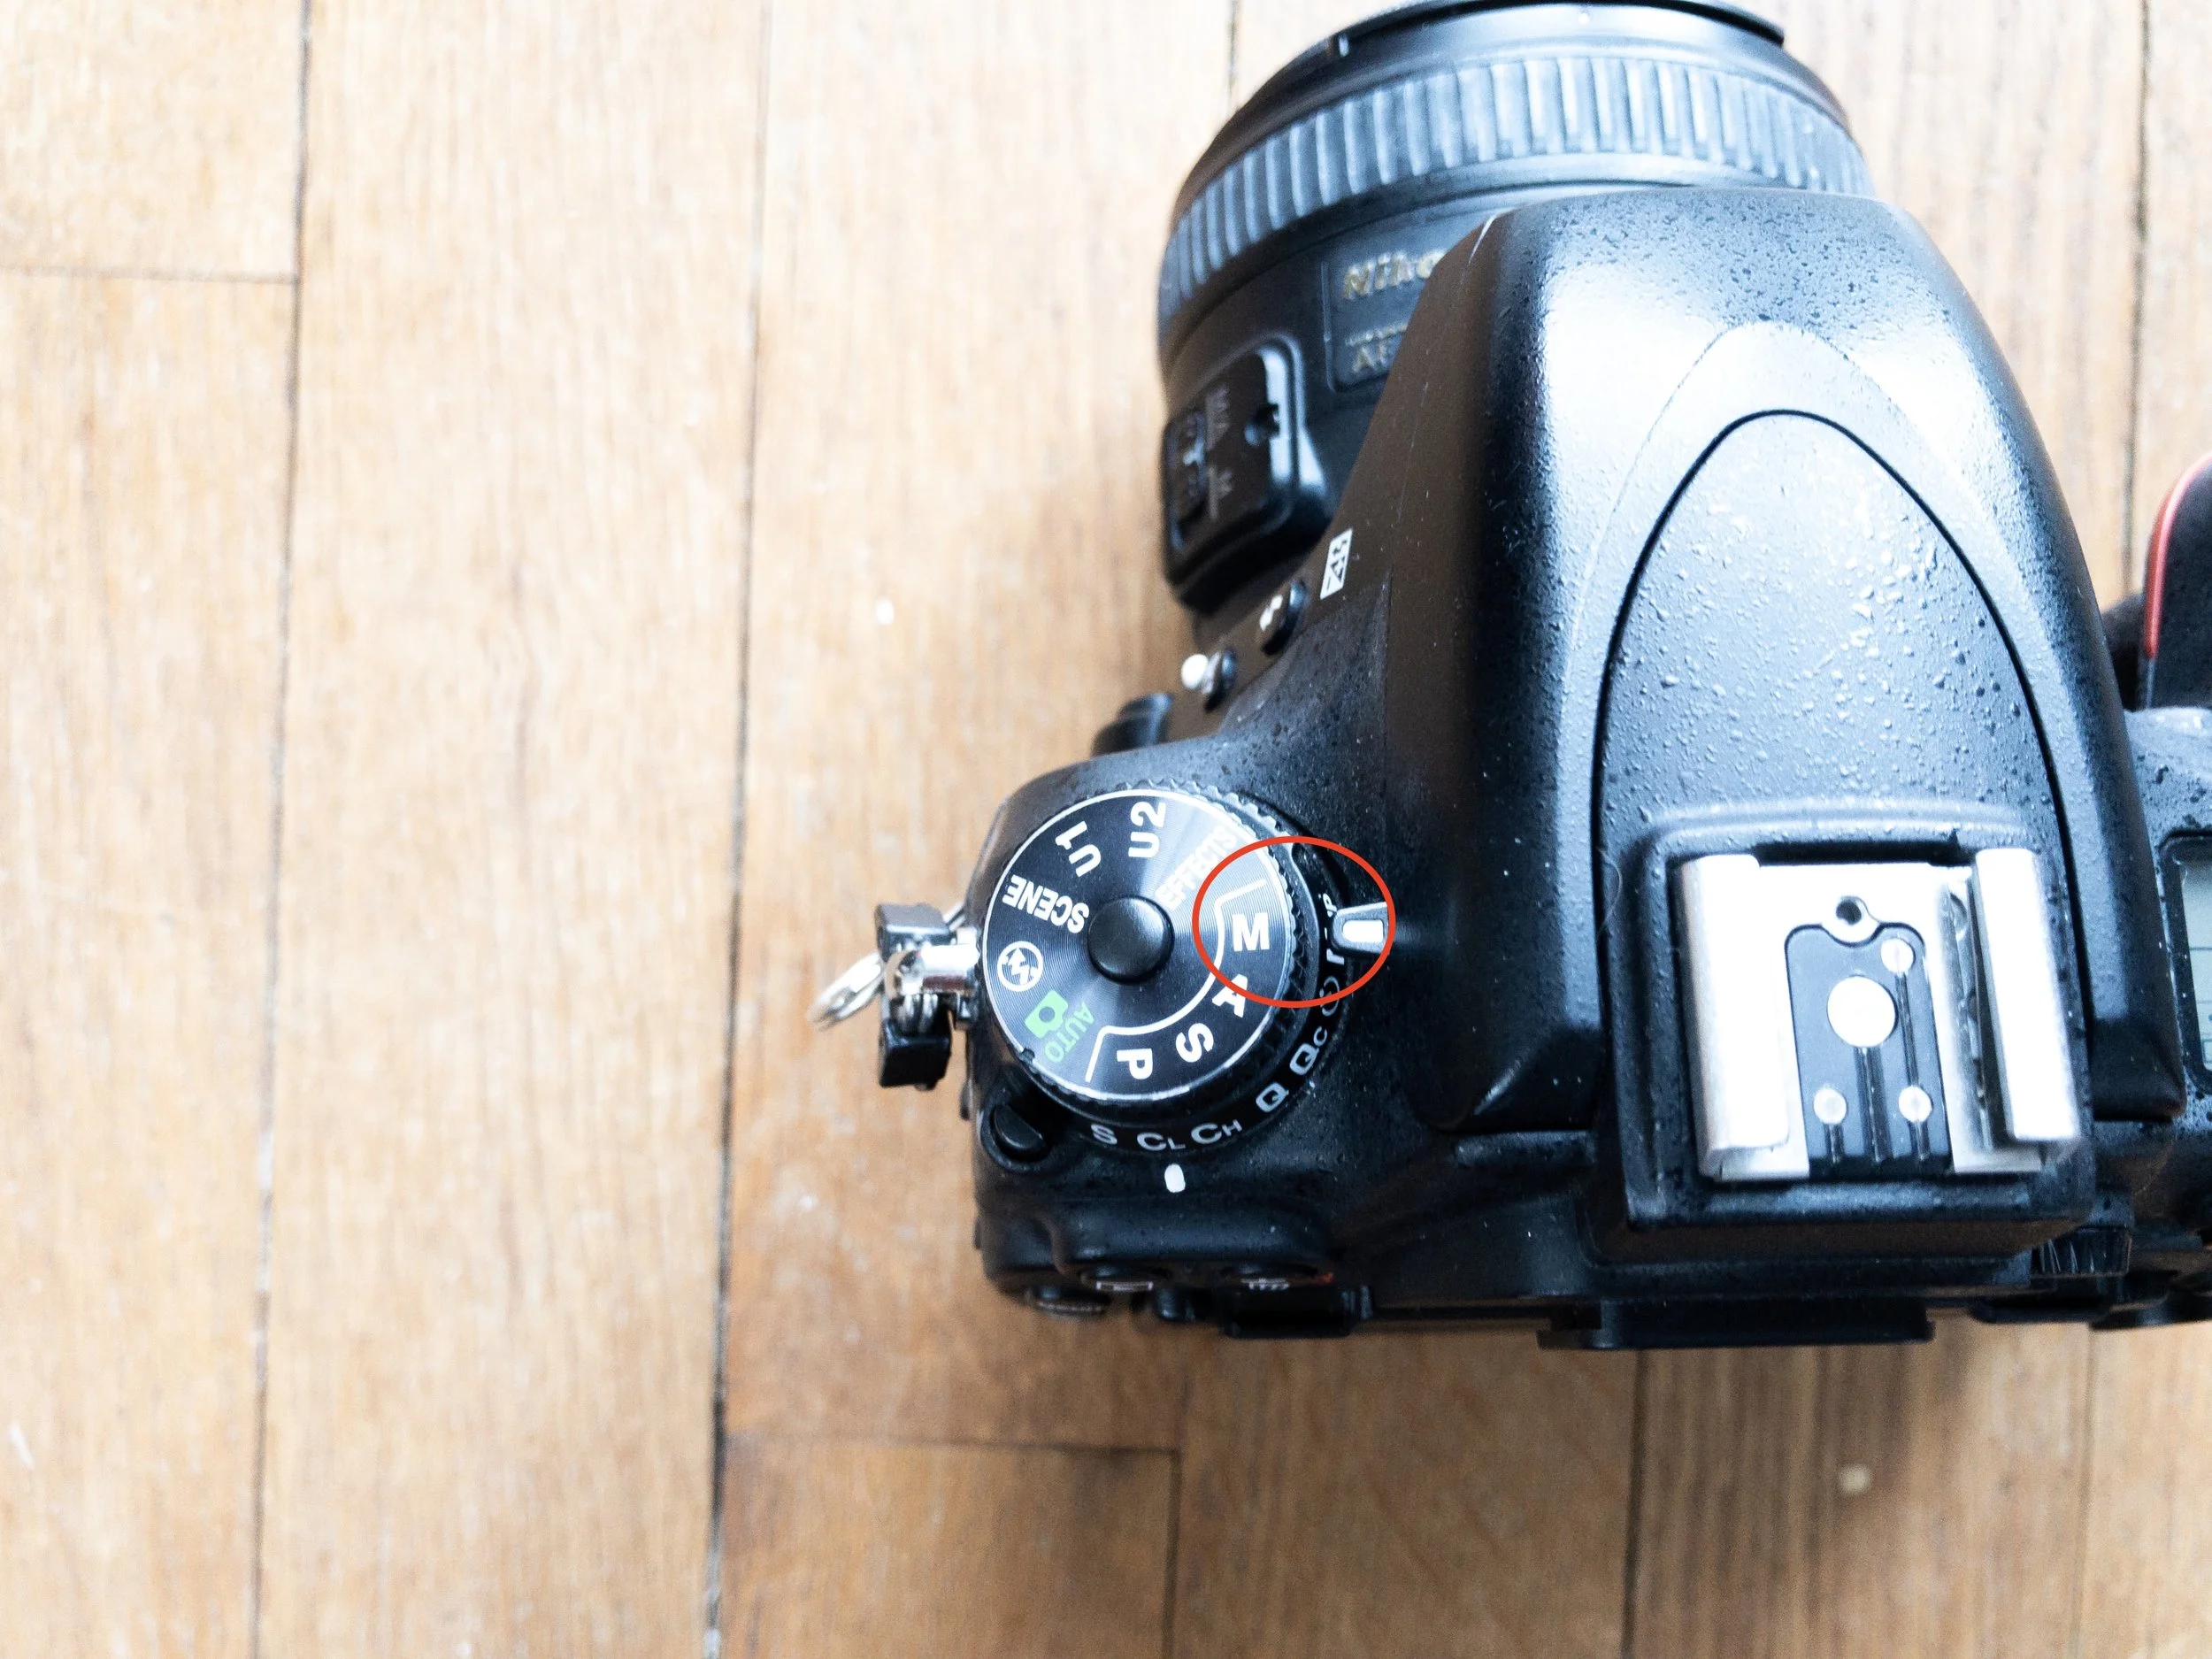
1) Switch Your Camera into A or Av Mode
Depending on your exact camera make and model, Aperture Priority may be noted as A or Av on your camera. In most DLSR cameras this is done through the dial on top or behind the camera
2) Pick your Aperture (or F-Stop). This may be denoted in your camera as f/2.8 or similar. Basically an F/ followed by a number.
TIP: Remember the lower the number the shallower the depth of field
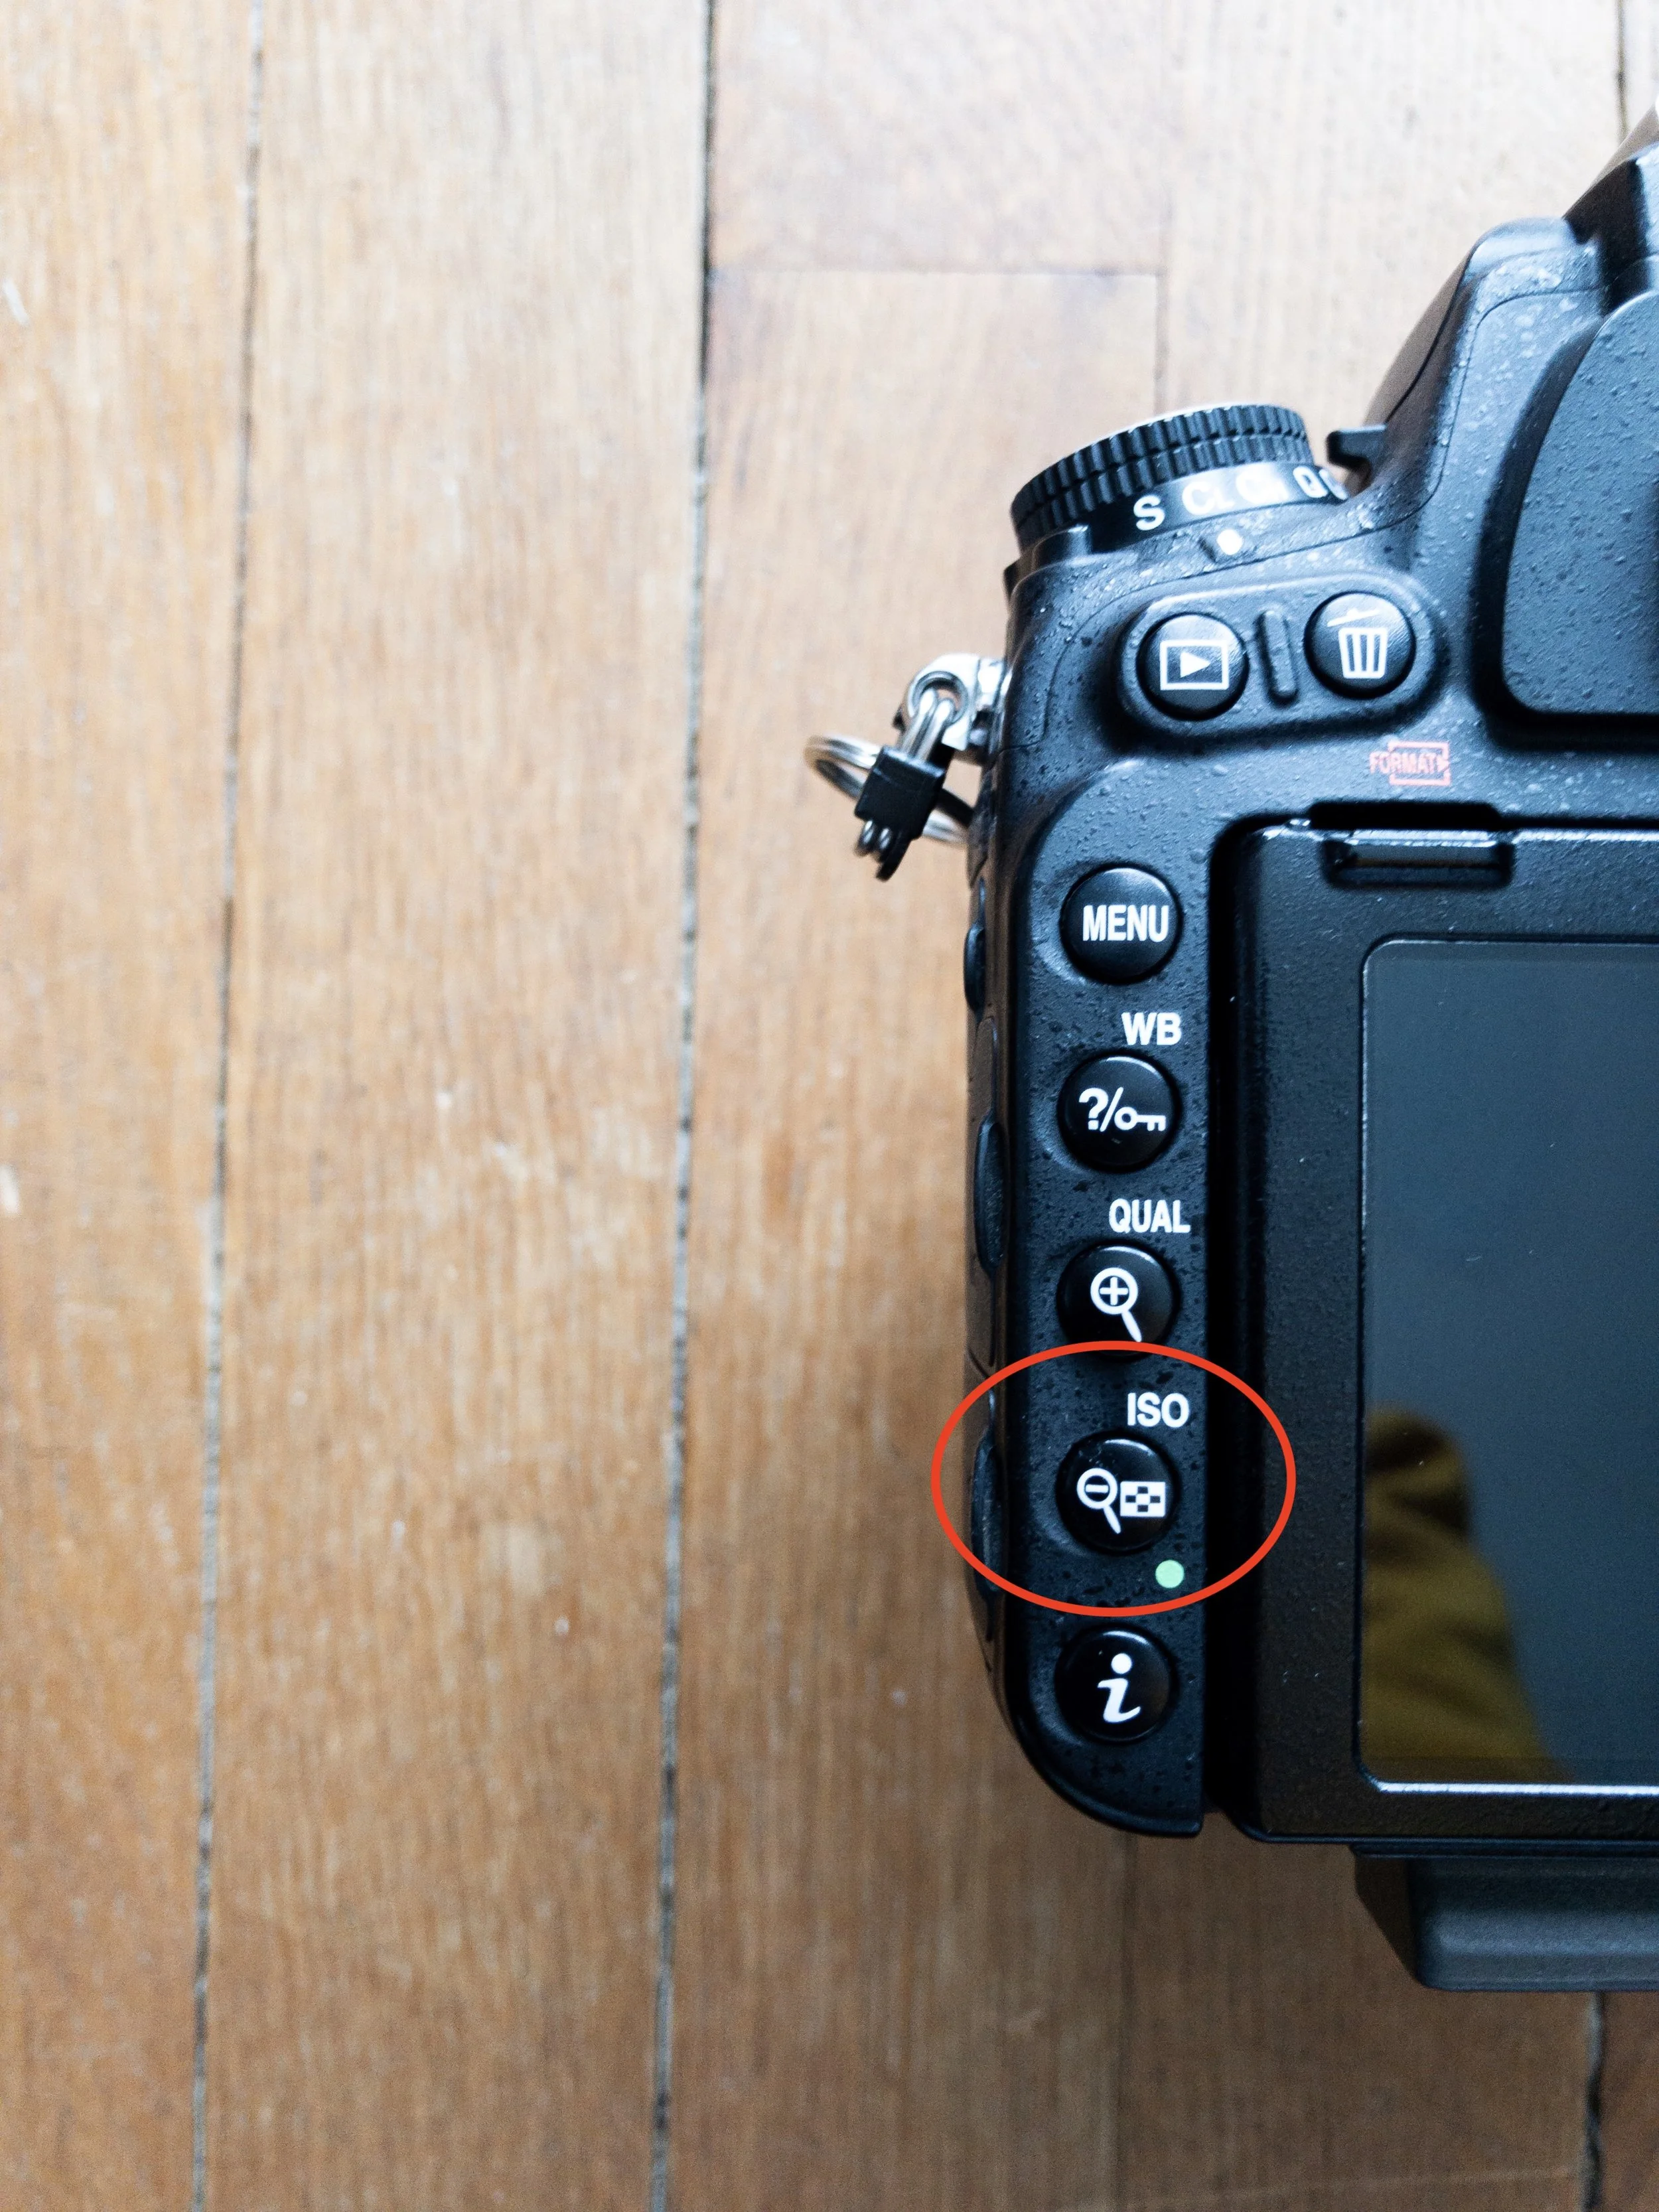
3) Select your ISO. Your cameras ISO controls how sensitive it is to light. I won’t go into too much detail on this so I would recommend sticking between 100-400 ISO. However if your scene is a little darker you may want to increase this number.
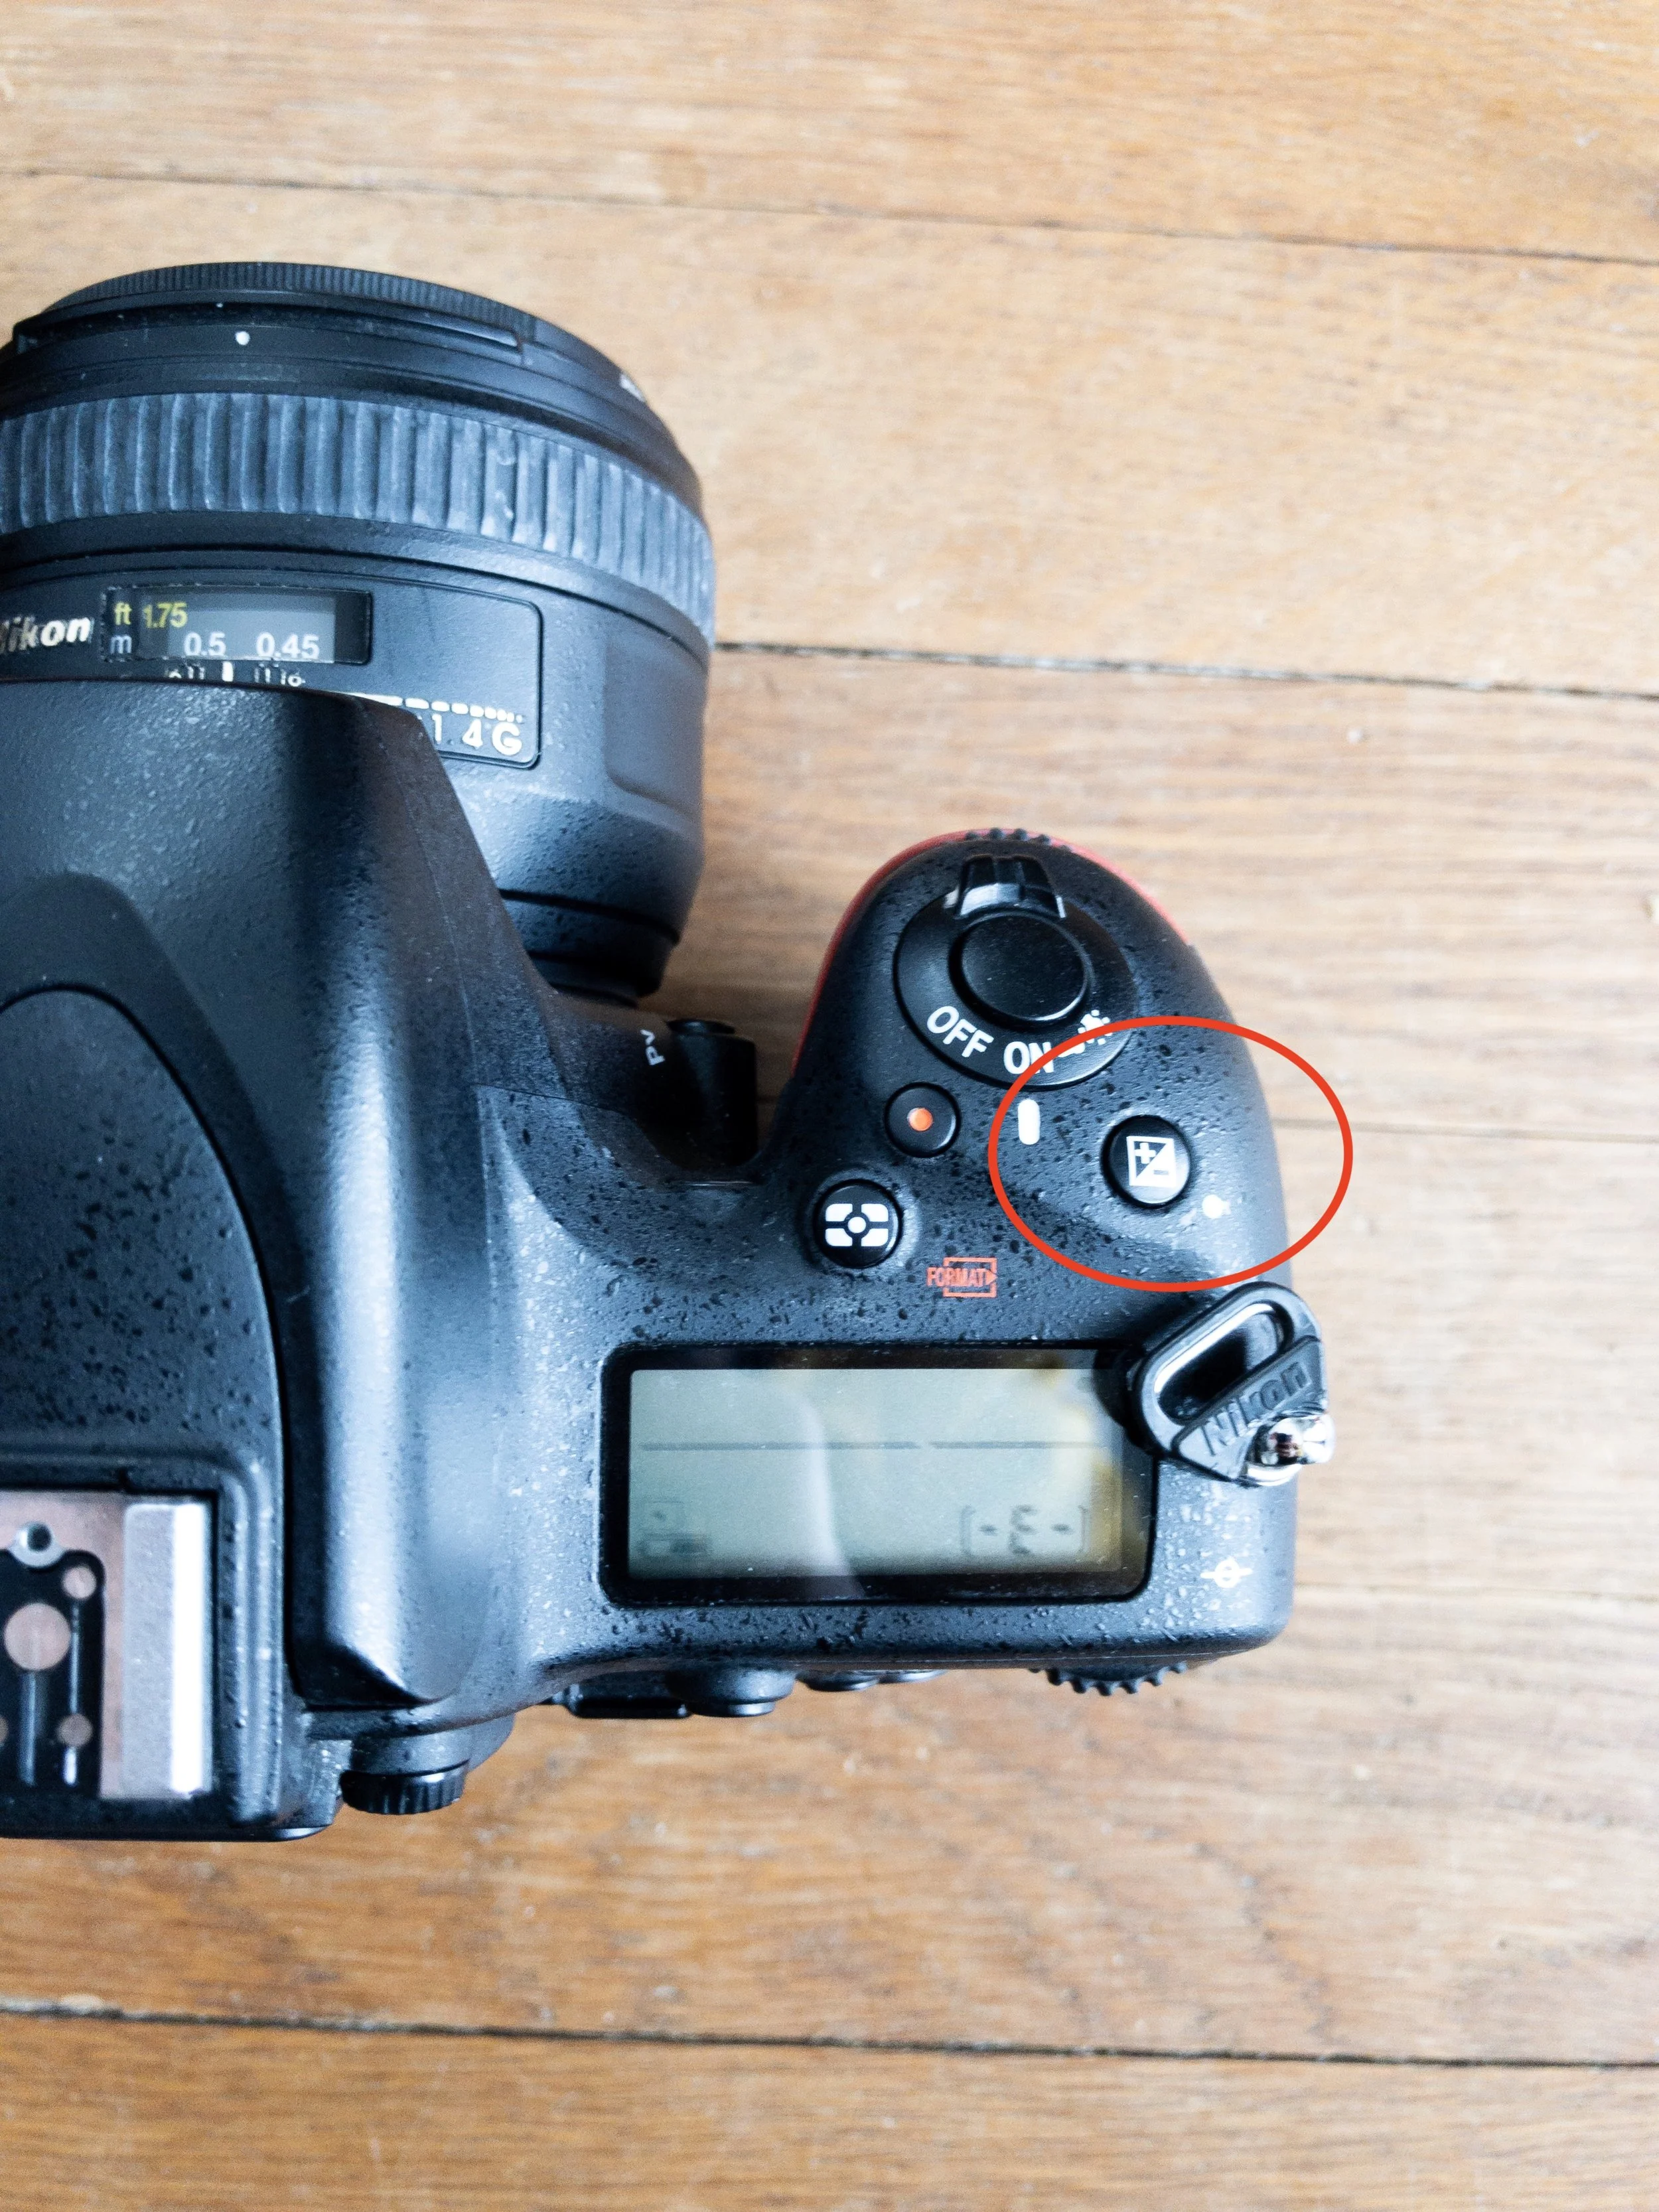
4) If you tend to prefer brighter images you can increase your exposure by using the +/- in your camera settings. This is called Exposure Compensation. Basically it’s telling the camera that you actually like it brighter or darker than what the camera resulting you with.
5) Take a few shots. If you’re finding that your shutter speed is really slow and that your images are coming out blurry, keep increasing your ISO until images come in sharp. The blurriness is from a slow shutter speed, so increasing your ISO will help increase your shutter speed.
If you need help setting your camera into Aperture mode, join my FB group and ask me for help there!